MCP Servers
This guide will help you create and integrate a custom MCP (Model Context Protocol) server into Appmixer so that it can be used with the AI Agent component or as part of regular flows.
Understanding MCP Server Integration in Appmixer
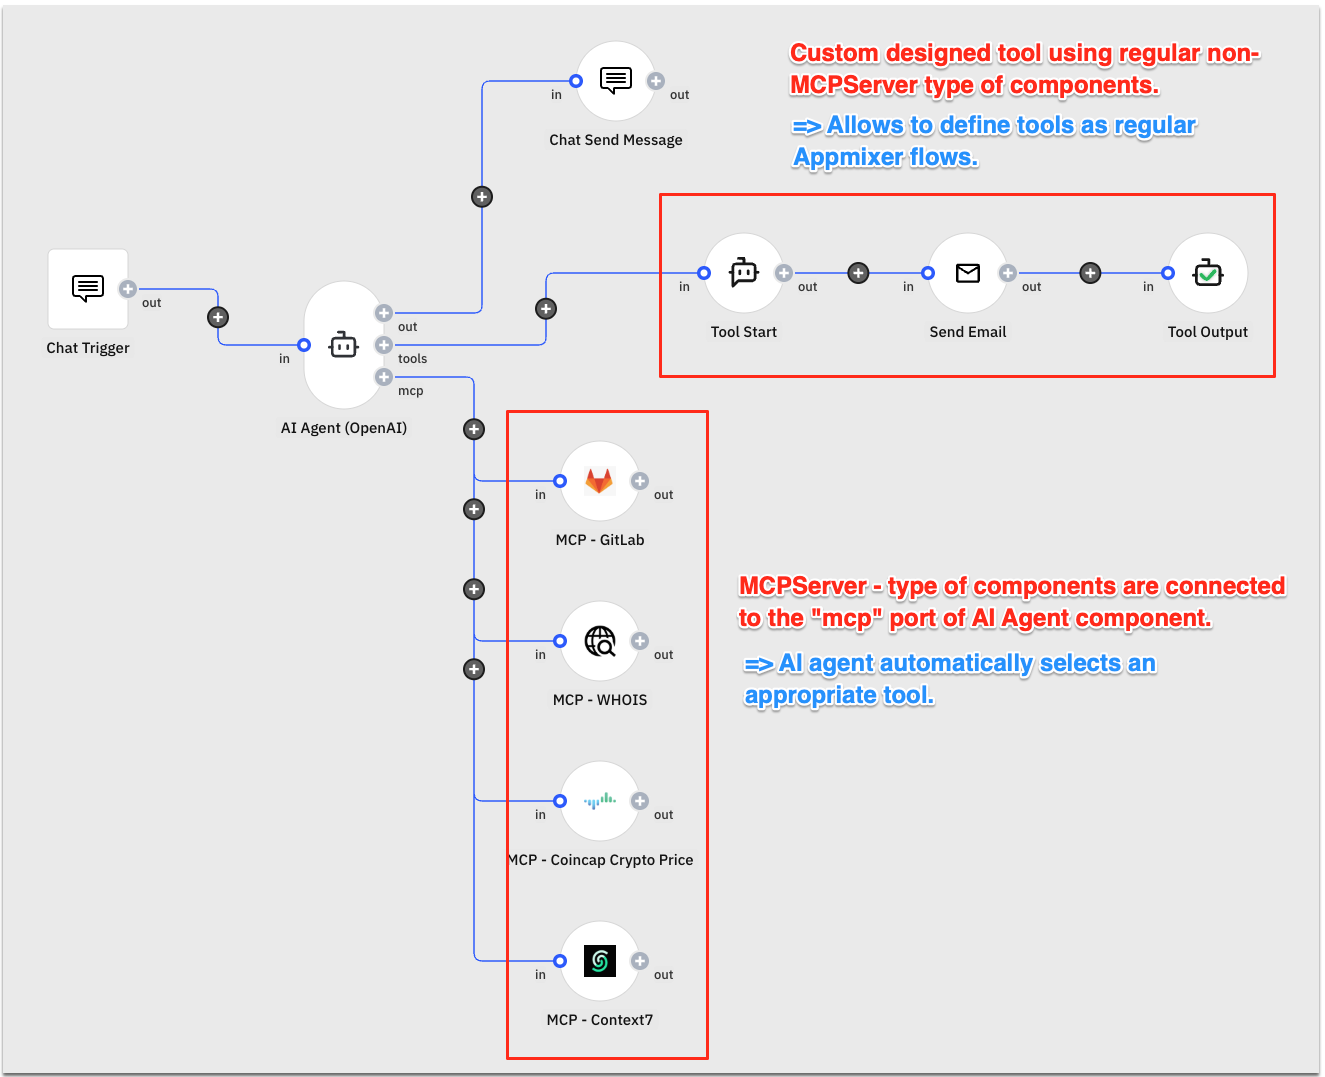
In Appmixer, MCP servers can only be connected to dedicated mcp ports of AI Agent components. This restriction ensures that AI Agents can communicate with MCP servers through a controlled and consistent interface.

MCP Server Connector Components
Every MCP server connector in Appmixer is composed of three distinct components:
Component
Purpose
Where it’s used
MCPServer
Core component that provides the actual MCP server connection and tool definitions.
Can be connected only to AI Agent component’s mcp port.
ListTools
Helper component that lists all available tools exposed by the MCP server.
Used internally by MCPServer (not standalone).
CallTool
Helper component to invoke a specific tool from the MCP server.
Used internally by MCPServer and can also be used standalone in regular flows to call a selected tool, similar to an action-type Appmixer component.
Important:
The AI Agent component
mcpport can connect only to MCPServer components.ListTools and CallTool are helper components for the MCPServer, but CallTool has the added ability to be used independently in non-AI Agent flows.
How to Implement a Custom MCP Server Connector
To integrate your own MCP server, you will create an Appmixer connector that wraps your server code, following the structure of existing MCP server connectors in our public repository.
Step 1 – Start from an Existing Example
Use one of our open-source MCP server connectors as a template:
Repository: appmixer-connectors/src/appmixer/mcpservers
Example: GitLab MCP Server Connector
The complete list of files of our Gitlab MCP Server connector looks like this:
Note: The GitLab example assumes that your MCP server uses the Stdio-style implementation of the MCP protocol. If your MCP server uses a different communication method, you may need to adjust the connector logic accordingly.
Step 2 – Files to Modify
From the example connector, most files are generic and can be reused. You only need to modify:
lib.js
Points to the NPM package containing your MCP server. Your MCP server must be NodeJS based. If you do not have a public NPM package with your MCP server, you can also package the MCP server directory directly in the Appmixer connector. Just make sure to reflect this in the paths.
Replace GitLab-specific logic with your own (if you used a different existing MCP server as a foundation, replace that MCP's specific logic with your own).
Ensure your MCP server package is listed in
package.jsondependencies (Unless you package your MCP server directly in the Appmixer connector directory, see above.)
auth.js
Define any required environment variables (API keys, credentials) for your MCP server.
These will be shown to the user in Appmixer Designer when they configure the connector.
Manifest & Metadata Files
package.json
Name following convention:
appmixer.mcpservers.<your_mcp_server_name>Add your public MCP server NPM package under dependencies.
module.json, bundle.json
Update name (use the same one as above, i.e. in the
package.jsonfile), label, description, and icons.
CallTool/component.json, ListTools/component.json, MCPServer/component.json
Update the name to follow the convention above (e.g.,
appmixer.mcpservers.your_mcp.CallTool).Update
auth.servicesection to match your connector name (e.g.,appmixer:mcpservers:your_mcp).Replace all occurrences of the GitLab connector path with your connector path.
Set your custom icon.
You generally do NOT need to edit:
MCPServer/MCPServer.jsListTools/ListTools.jsCallTool/CallTool.js
These files contain generic logic that works for all MCP servers.
Packaging and Publishing
Once you have updated the connector, follow the standard instructions to pack and publish your connector to your Appmixer tenant as described here.
Summary Checklist
Before publishing:
Updated
package.jsonwith correct name and NPM MCP server dependency.Updated
module.json,bundle.jsonwith correct name, metadata and icons.Edited
lib.jsto point to your MCP server code.Configured
auth.jswith required authentication fields.Updated
component.jsonfiles for all three components.Tested
CallToolboth as helper and standalone in a flow.Connected
MCPServerto an AI Agentmcpport and verified tool discovery.
Was this helpful?
