Use App Events
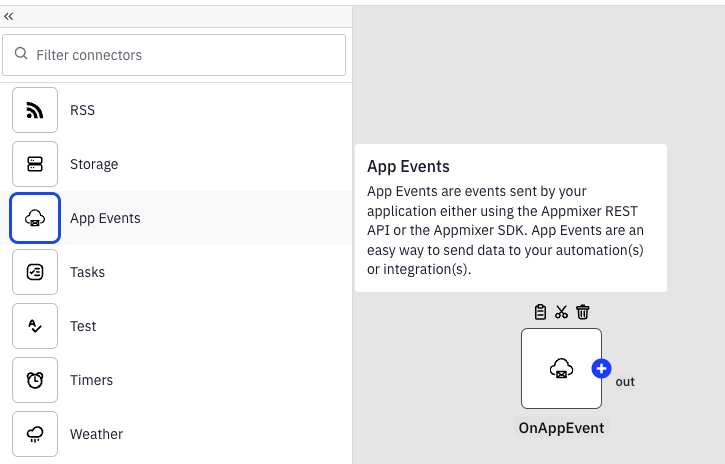
App Events provide the simplest method for sending data to Appmixer. To utilize App Events, select the OnAppEvent trigger from the Utilities category of connectors:

Note that another convenient way to trigger your automations is by using the Webhook component from the HTTP module. However, the Webhook component may not be as effective for building integration templates. This is because when integrations are activated by end-users, the Webhook component generates a new URL each time since each activated integration is a new instance derived from the template. Consequently, the Webhook URL displayed in the inspector panel (configuration panel) during template creation will not match the URLs in the actual integration instances.
In contrast, the OnAppEvent trigger creates a named webhook, allowing you to target a specific user with specific events and data by calling it with the actual end-user access token.
In summary, if you only care about automations where the webhook URL is known, you can use Webhook. If you build integration templates, use OnAppEvent instead.
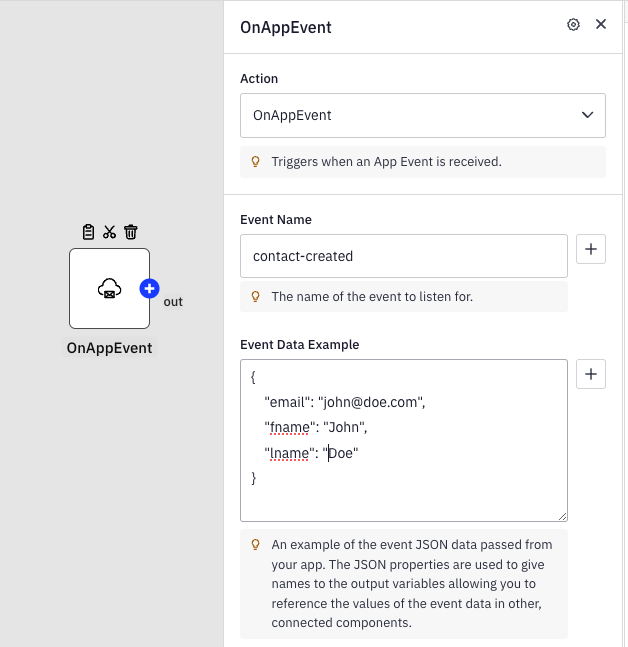
Assign a meaningful name to your app event and consider providing sample data. Although including sample data is optional, it facilitates referencing the data from the app event in subsequent components.

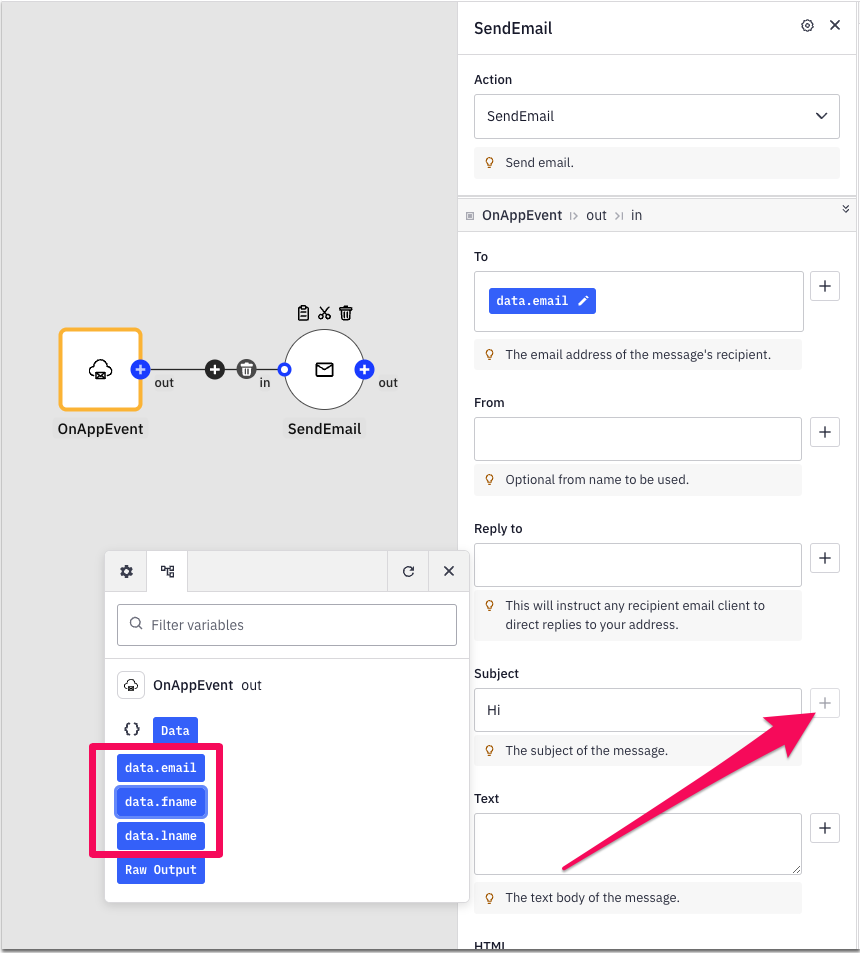
Providing an Event Data Example populates all detected JSON fields as variables in subsequent connected components. This allows you to easily use and reference these data placeholders throughout your integration, ensuring that the necessary information is accessible and can be dynamically incorporated into various parts of your workflow. This practice enhances the configurability and functionality of your automations by clearly mapping out how data flows between components.

Triggering OnAppEvent using Appmixer SDK
Once your automation or integration templates are built, published, and users begin activating your integrations, you can trigger app events by using the appmixer.api.sendAppEvent(EVENT, DATA) function provided by the client-side Appmixer SDK. This function enables you to programmatically send events and associated data through your application, facilitating real-time interaction and response within your integrations.
This triggers all the integrations or automations associated with the user who is authenticated with the access token used in the SDK, specifically targeting those that begin with the OnAppEvent configured with the Event Name set to contact-created.
You can also trigger the event by using the built-in UI in Appmixer Studio:
Open the Integration Designer in Studio and create a new integration with an OnAppEvent trigger.
Instead of publishing, click Start Test to run a temporary test instance of your integration.
While the test is running, click Test → Send App Event in the top bar.
Enter the event name (as configured in your trigger) and any test data you want to send.
Submit the form to trigger your integration test and observe the results before publishing.
Triggering OnAppEvent using HTTP requests
Alternatively, you can trigger the OnAppEvent from either client-side or backend-side code by sending an HTTP POST request to the endpoint https://YOUR_APPMIXER_TENANT_API_URL/plugins/appmixer/utils/appevents/events/EVENT. When making this request, include the event data in the payload. This method allows you to directly interact with the Appmixer system via HTTP, providing flexibility to trigger events from various parts of your application infrastructure.
If you don't have the access token for a virtual user, you can obtain it by using their username and password to call the Sign-in endpoint. This process involves submitting the necessary credentials to authenticate the user, after which the endpoint will provide an access token. This token can then be used to authorize subsequent actions or API calls under that user's identity.
Was this helpful?
