Additional Configuration
This page contains additional system configuration options that are provided for self-managed Appmixer installations. See the System Configuration for the rest of the configuration options. The options below can be set via the environment variables on the instances of the Appmixer engine.
API and Worker nodes
Appmixer 6.2 introduces the ability to easily start a pod as either an API node or a worker node. If you deployed Appmixer using the Helm Chart, no action is required—the chart already supports separate API and worker nodes.
Running an API node only
To run a node as an API node only, pass the --no-worker argument in your deployment configuration (engine.yaml):
...
    spec:
      containers:
        - args:
            - -c
            - node gridd.js --http --no-worker       ## API node only
          command:
            - /bin/sh
... Running a worker node only
To run a node as a worker only, do not use the --http argument. The pod must be started without any arguments.
You will need to create a separate deployment configuration for the worker node. This can be a copy of engine.yaml with the arguments removed:
Logging
LOG_LEVEL
By default set to info. It can be changed to error, warn or debug.
LOG_COMPONENT_DATA_MESSAGE
When set to false, the component's input/output messages won't be logged into Elasticsearch.
Important! Appmixer Insights and Designer log messages won't contain any items if logging data messages are turned off.
APPMIXER_HTTPS_PROXY and APPMIXER_HTTP_PROXY
Configure an HTTP proxy. All HTTP(S) requests from Appmixer will be redirected to the proxy URL.
Token Encryption
Most of the connectors in Appmixer require user authentication. That can be represented as OAuth access tokens, API keys, or username/password combinations.
To enable token encryption, set the ENCRYPTION_ENABLED environment variable to true. With that, also set the ENCRYPTION_SECRET environment variable to a secret string (see below for an example on how to generate it).
If you lose the encryption secret, you will not be able to recover the encrypted tokens.
MinIO/S3
Appmixer contains a MinIO plugin. If this plugin is turned on, Appmixer will store all user files (files created either through Appmixer flows or through the /files API) in the MinIO/S3 server.
The plugin cannot migrate existing files from MongoDB to MinIO. It has to be turned on when Appmixer is installed before the files are created. If you already have files in MongoDB and want to start using MinIO, you have to migrate the data.
To enable the plugin, add minio to the SYSTEM_PLUGINS (comma-separated list of plugins) ENV variable (this variable cannot be set dynamically through the Backoffice - System Configuration):
If you want to use AWS S3, use the following permissions:
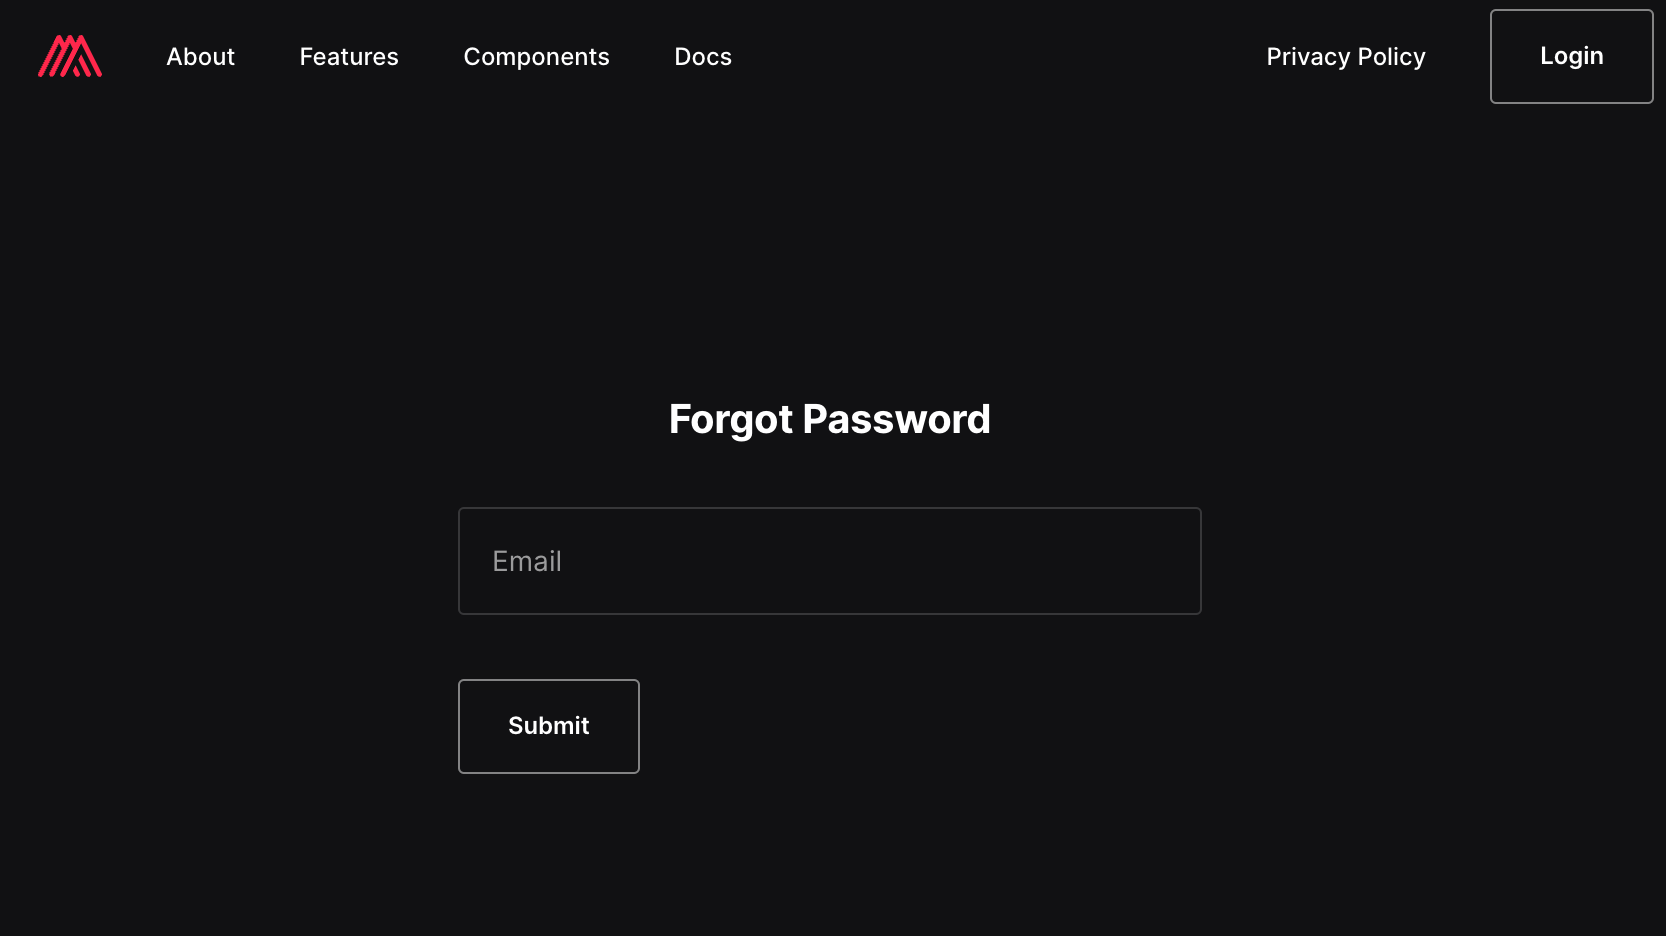
Forgot Password Service
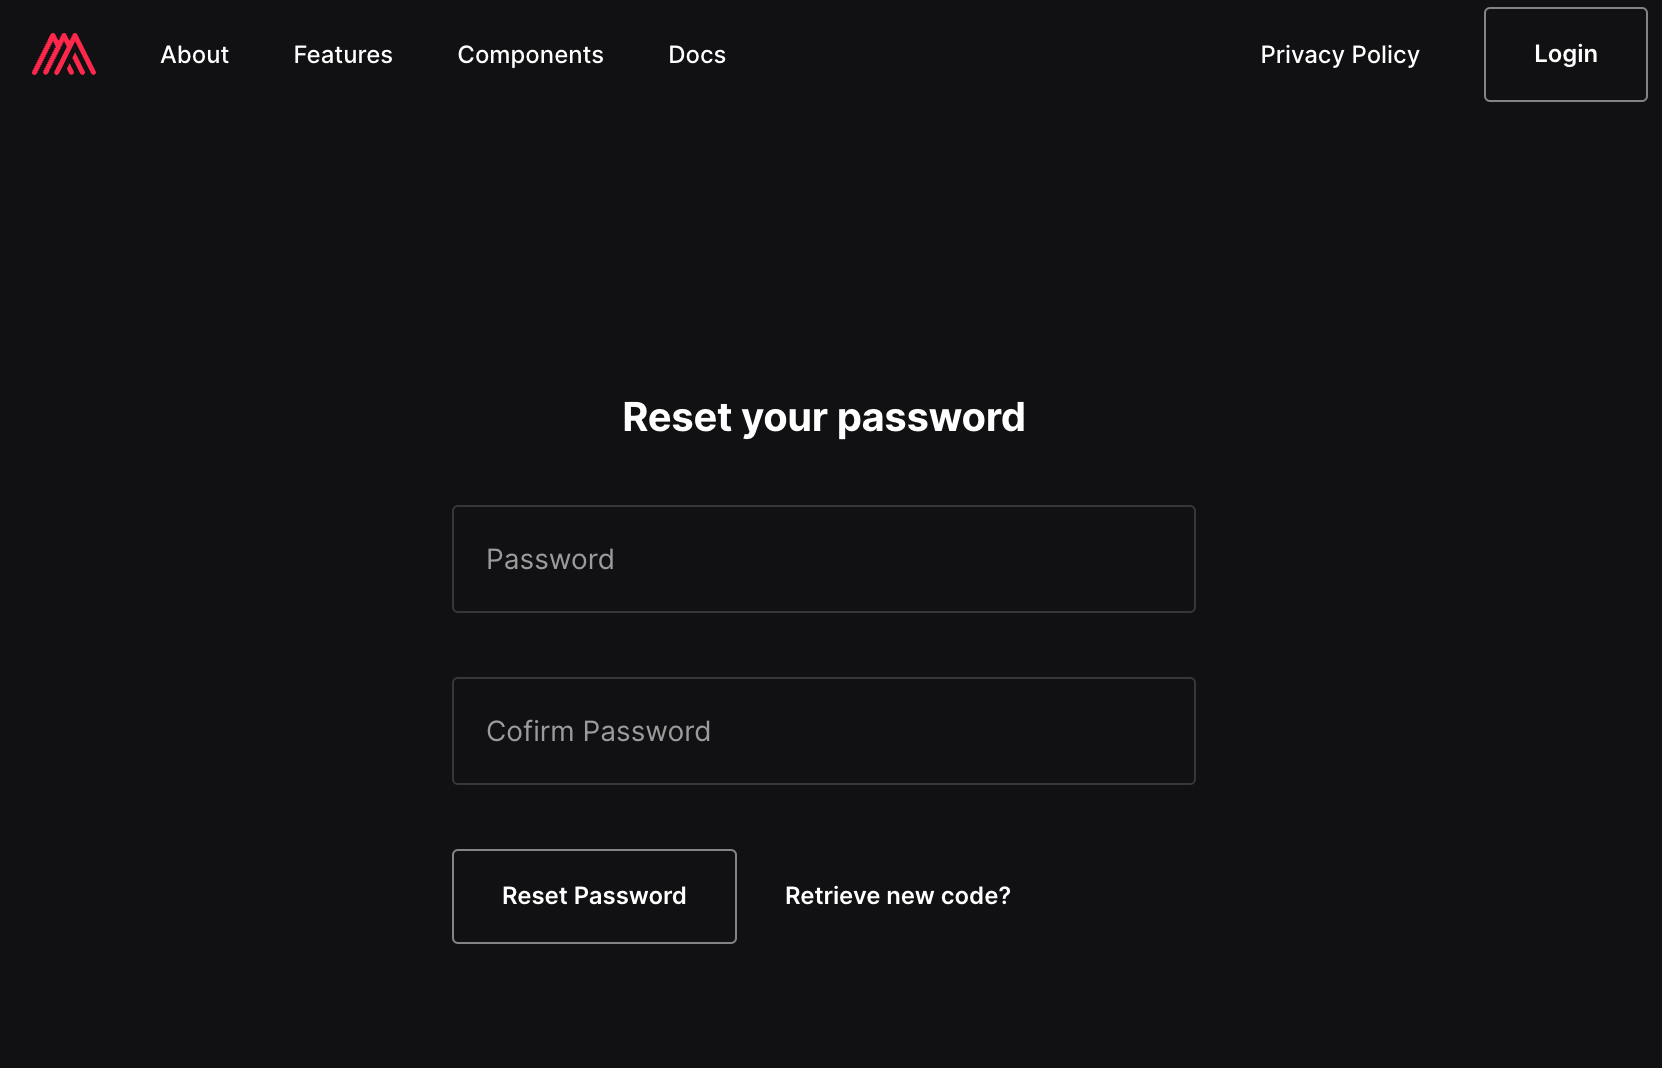
Appmixer provides an API to reset forgotten passwords. This works together with the Appmixer Studio interface (not the Appmixer SDK).

In order to create a link that can be sent to the user, the Appmixer engine needs to know the frontend URL, there are two variables that can be set for that:
APPMIXER_FE_URL
The Frontned URL
http://localhost:8080
RESET_PASSWORD_FE_URL_SUFFIX
URL path with the reset password form
reset-password
Without any changes, the link will be http://localhost:8080/reset-password?code={{code}}.

That link has to be then delivered to the user. There are two ways this can be done:
Webhook
You can register a system webhook that will be triggered every time a user requests to change their password. The webhook URL can be registered under the key WEBHOOK_USER_FORGOT_PASSWORD and the JSON object sent to that URL will be:
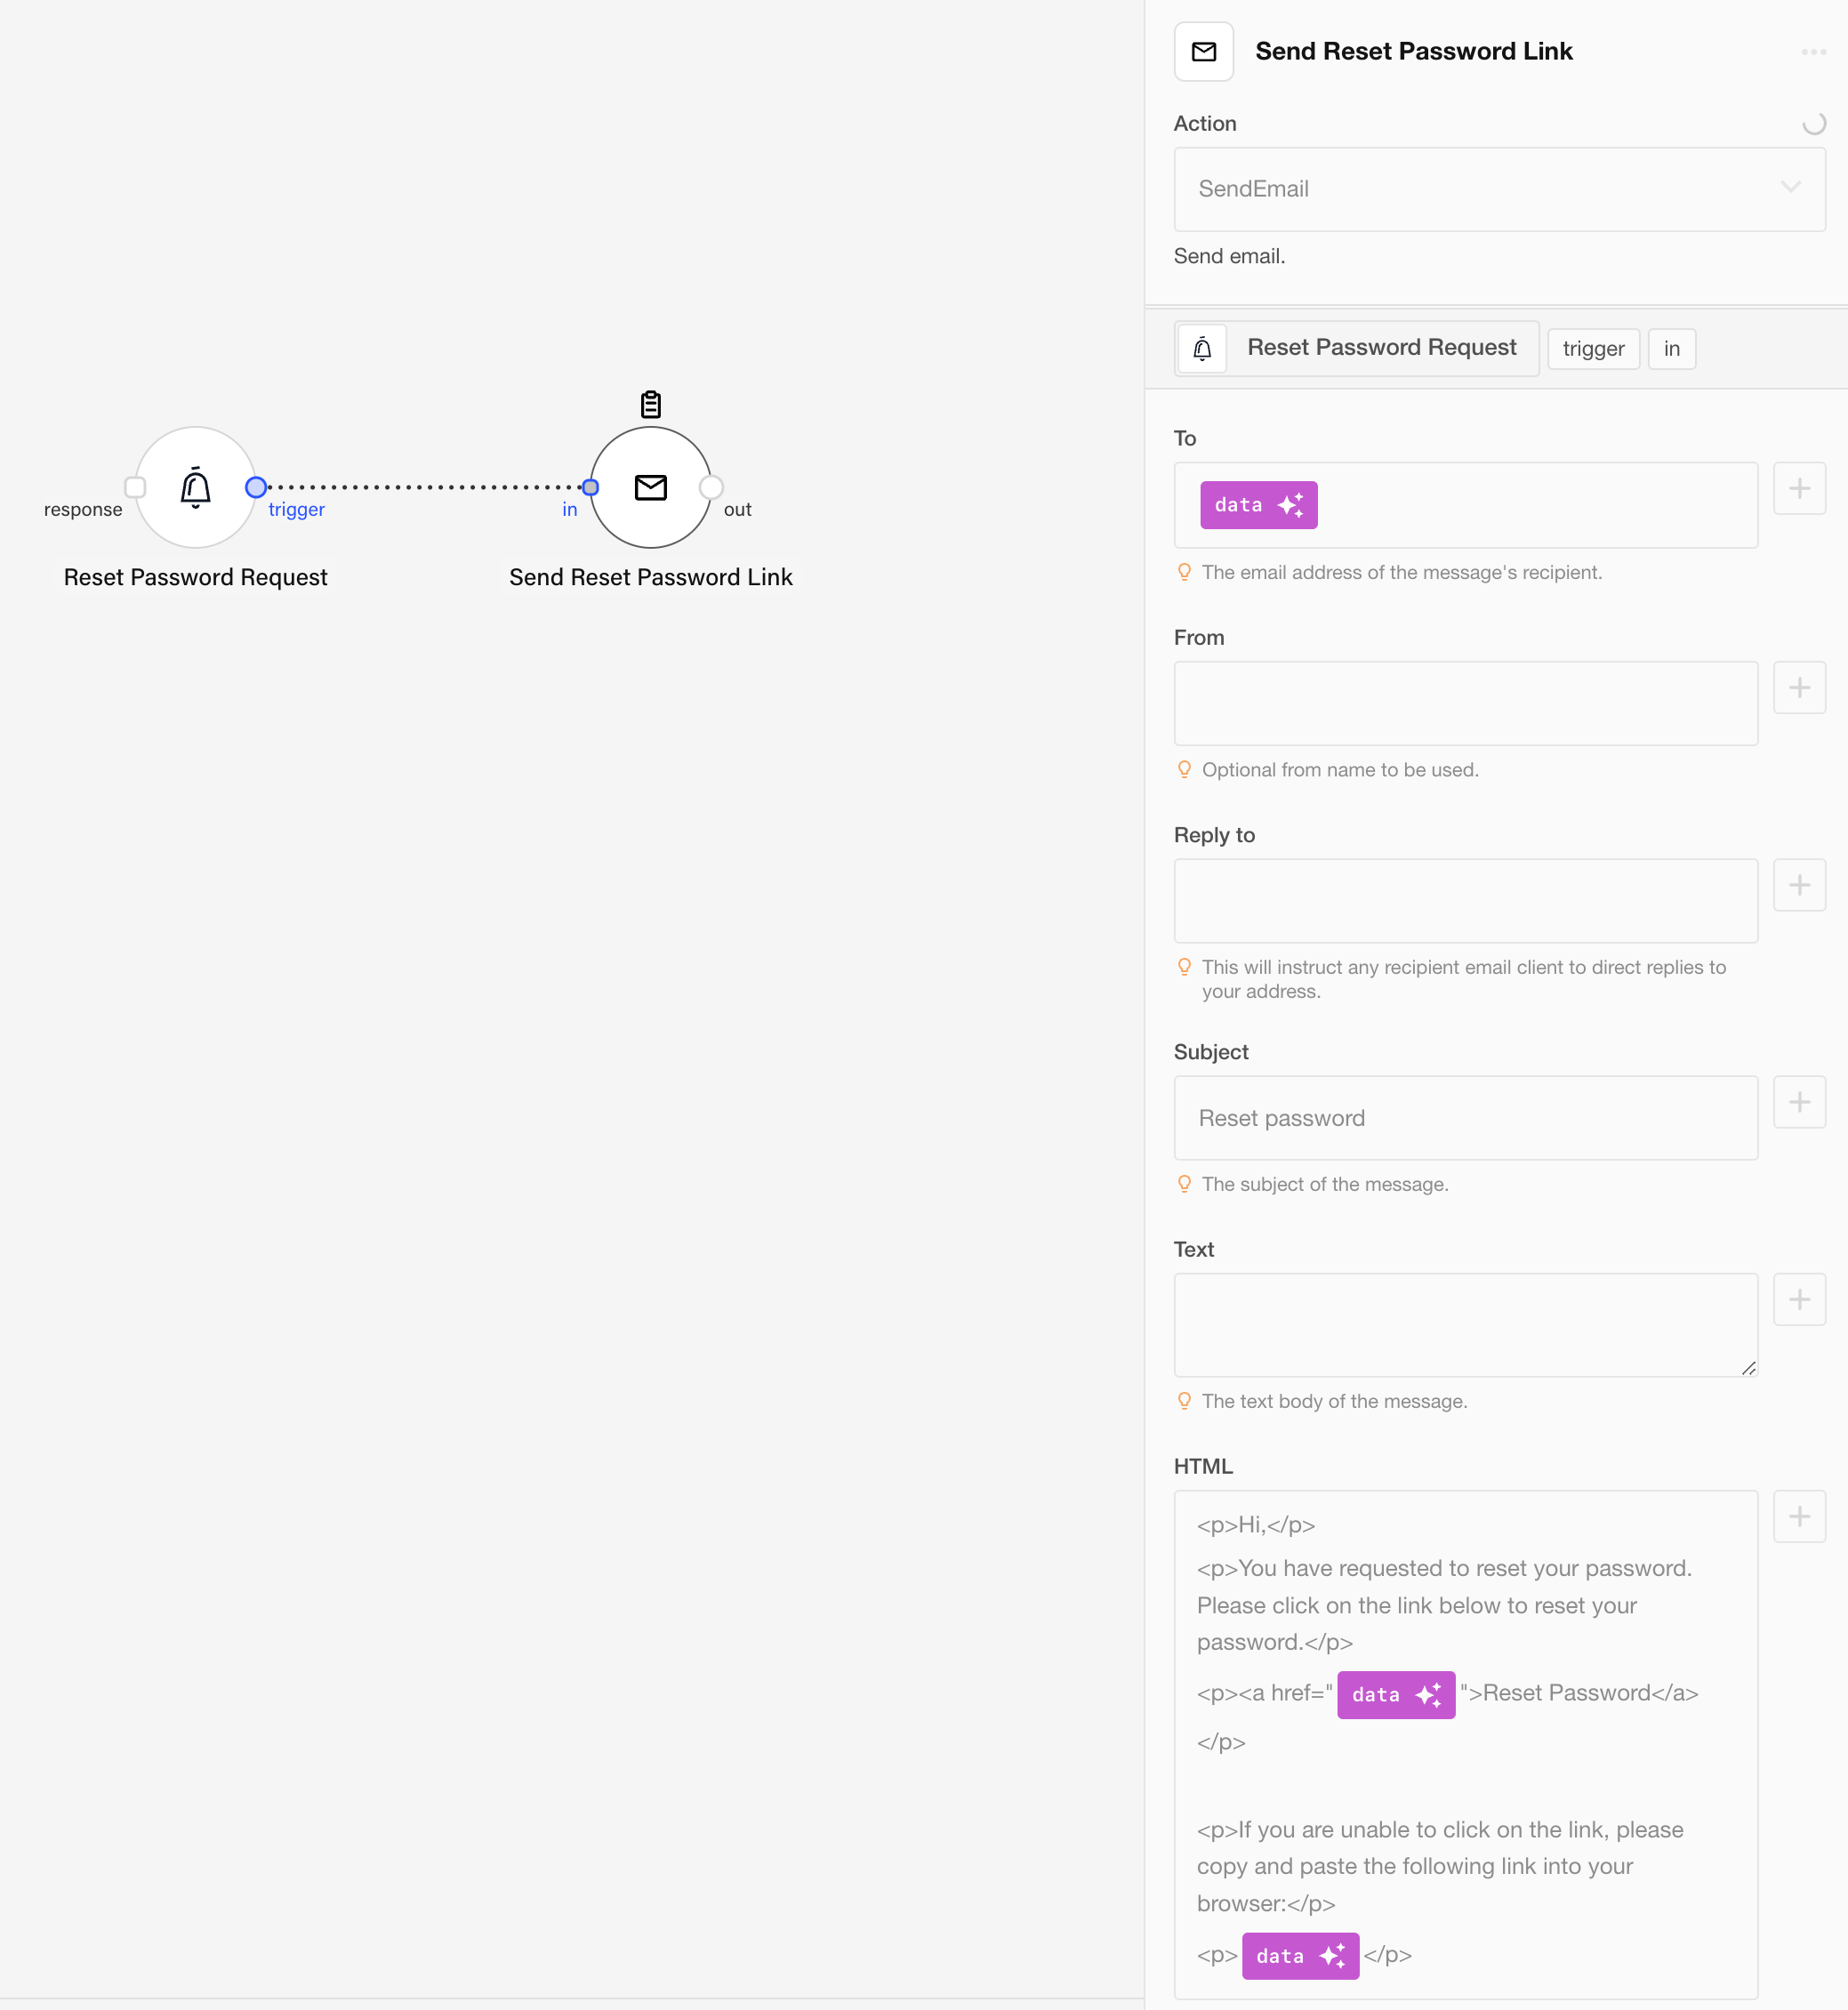
You can use Appmixer to create a simple flow, that would send emails with the reset password link.

SMTP
The other way is to configure the SMTP server, Appmixer will then send an email with the reset password link to the user's email address.
MAIL_SMTP_HOST
SMTP server address
MAIL_SMTP_PORT
SMTP server port
465
MAIL_SMTP_USER
username
MAIL_SMTP_PASS
password
MAIL_FROM_NAME
Sender name
Appmixer
FORGOT_PASSWORD_MAIL_SUBJECT
Reset password email subject.
Reset your password
FORGOT_PASSWORD_MAIL_BODY
The reset password email body.
See below
The default email body:
If the forgot password webhook is configured as explained above, the Appmixer engine will not send the email to the user and it will trigger the webhook instead.
Context Quotas
Components produce messages using the context.sendJson() function. An internal quota mechanism controls how many messages a user can produce.
This is the default configuration:
Each call to context.sendJson() increases the quota. If a limit is reached, the message is placed in a Slow Queue. Messages in the Slow Queue are processed at a much slower rate and only when sufficient resources are available. This ensures that one user’s flows do not consume excessive resources and block other users.
If you want to change the default values, you can use the Env variables QUOTA_CONTEXT_SEND and QUOTA_CONTEXT_SLOW_QUEUE, you can set them in the Backoffice.

QUOTA_CONTEXT_SEND default value, you can copy&paste this to the Backoffice and modify.
QUOTA_CONTEXT_SLOW_QUEUE default value, you can copy&paste this to the Backoffice and modify.
Garbage Collectors
Files
The garbage collector for files can be turned off with GC_FILES_ENABLED (set to false). The behavior can be controlled by a set of rules GC_FILES_RULES.
This is the default set:
The value of GC_FILES_RULES is a stringified array of rules. There can be a different rule for each scope of users. Each rule has to have exactly 3 properties - scope, ttl and hardLimit.
Example:
In this example, the admin users can store files up to 90GB and their files will be deleted after 1440 hours (60 days).
When the users exceed the hardLimit, they he will not be able to create more files. To get unblocked, they must delete some of their files and get under the limit.
The garbage collector does not remove files uploaded via the Files API, or files marked as archived.
Was this helpful?
