LogoLogo
6.1
  • Docs
  • Connector Configuration
  • Knowledge Base
  • Changelog
6.1
  • Introduction
  • Getting Started
    • Build and Publish an Integration
    • Build and Run an Automation
    • Build and Run an AI agent
    • Build a Custom Connector
    • Embed into Your Application
    • Monitor & Troubleshoot
    • Access Appmixer REST API
    • Install and Update Connectors
    • Connector Configuration
    • Handle Flow Errors
    • Use App Events
    • End User Guide
  • API
    • Authentication
    • Flows
    • Apps
    • Accounts
    • User
    • Insights
    • Files
    • Data Stores
    • Connector Configuration
    • People Task
    • ACL
    • Charts
    • Config
    • Modifiers
    • Public Files
    • Unprocessed Messages
    • Variables
  • Building Connectors
    • Flow
    • Component
    • Basic Structure
    • Manifest
      • name
      • label
      • icon
      • description
      • auth
      • inPorts
      • outPorts
      • properties
      • quota
      • tick
      • private
      • webhook
      • httpRequestMethods
      • state
      • author
      • marker
      • localization
      • firePatterns
    • Behaviour
    • Dependencies
    • Authentication
    • Quotas & Limits
    • Example: twilio.SendSMS
    • Example: Webhook Trigger
  • Appmixer UI SDK
    • Introduction
    • Installation
    • Quick Start
    • Constructor
    • API Module
    • UI & Widgets
      • Flow Manager
      • Designer
      • Insights Logs
      • Insights Chart Editor
      • Insights Dashboard
      • Accounts
      • Storage
      • People Tasks
      • Connectors
      • Integrations
      • Wizard
    • Custom API
  • Customizing Embedded UI
    • Custom Theme
    • Custom Strings
    • Custom Component Strings
  • Appmixer Backoffice
    • Getting Started
    • System Configuration
  • Appmixer CLI
    • Getting Started
    • OpenAPI Connector Generator
      • Getting started
      • Open API Extensions
      • Examples
  • Appmixer Self-Managed
    • Installation Docker Compose
    • Installation AWS ECS
    • Getting Started
    • Authentication Hub
    • Additional Configuration
    • Appmixer Architecture
    • Appmixer Deployment Models
  • Tutorials
    • Appmixer Virtual Users
    • Flows Metadata & Filtering
    • Access Control
    • Sharing Flows
    • People Tasks
    • Customizing modifiers
  • App Registration
    • Airtable
    • ActiveCampaign
    • Asana
    • Azure Cognitive Services
    • Blackboard
    • DeepAI
    • DocuSign
    • Dropbox
    • Freshdesk
    • Google
    • Highrise
    • Hubspot
    • Jira
    • Jotform
    • LinkedIn
    • Mailchimp
    • Microsoft
    • Microsoft Dynamics 365 CRM
    • Monday
    • Open AI
    • Pipedrive
    • Quickbooks
    • Redmine
    • Salesforce
    • Schoology
    • Screenshot API
    • ServiceNow
    • Slack
    • Trello
    • Typeform
    • Twilio
    • Twitter
    • Utilities
      • AI
      • Email
      • Language
      • Tasks
      • Test
      • Weather
      • AppEvents
    • Xero
    • Zendesk Tickets
    • Zendesk Chat
    • Zoho
  • Connectors
    • Connector Request
Powered by GitBook
On this page
  • Access the Twitter App Console
  • Create OAuth app
  • User Authentication Settings
  • Keys and Tokens

Was this helpful?

Export as PDF
  1. App Registration

Twitter

Configure the Twitter.

PreviousTwilioNextUtilities

Was this helpful?

Access the Twitter App Console

  • Navigate to the and sign up if you haven't already.

  • You might be required to apply for a developer account where you'll need to provide some information about your intended use of Twitter’s API.

Create OAuth app

  • After logging in to your Twitter Developer account, navigate to the .

  • Twitter should automatically create a default project and application for you. If it doesn't, click "Create Project" and follow the prompts to set up a new one. After creating the project, you'll be able to create an application. Navigate to your project and select "Add App."

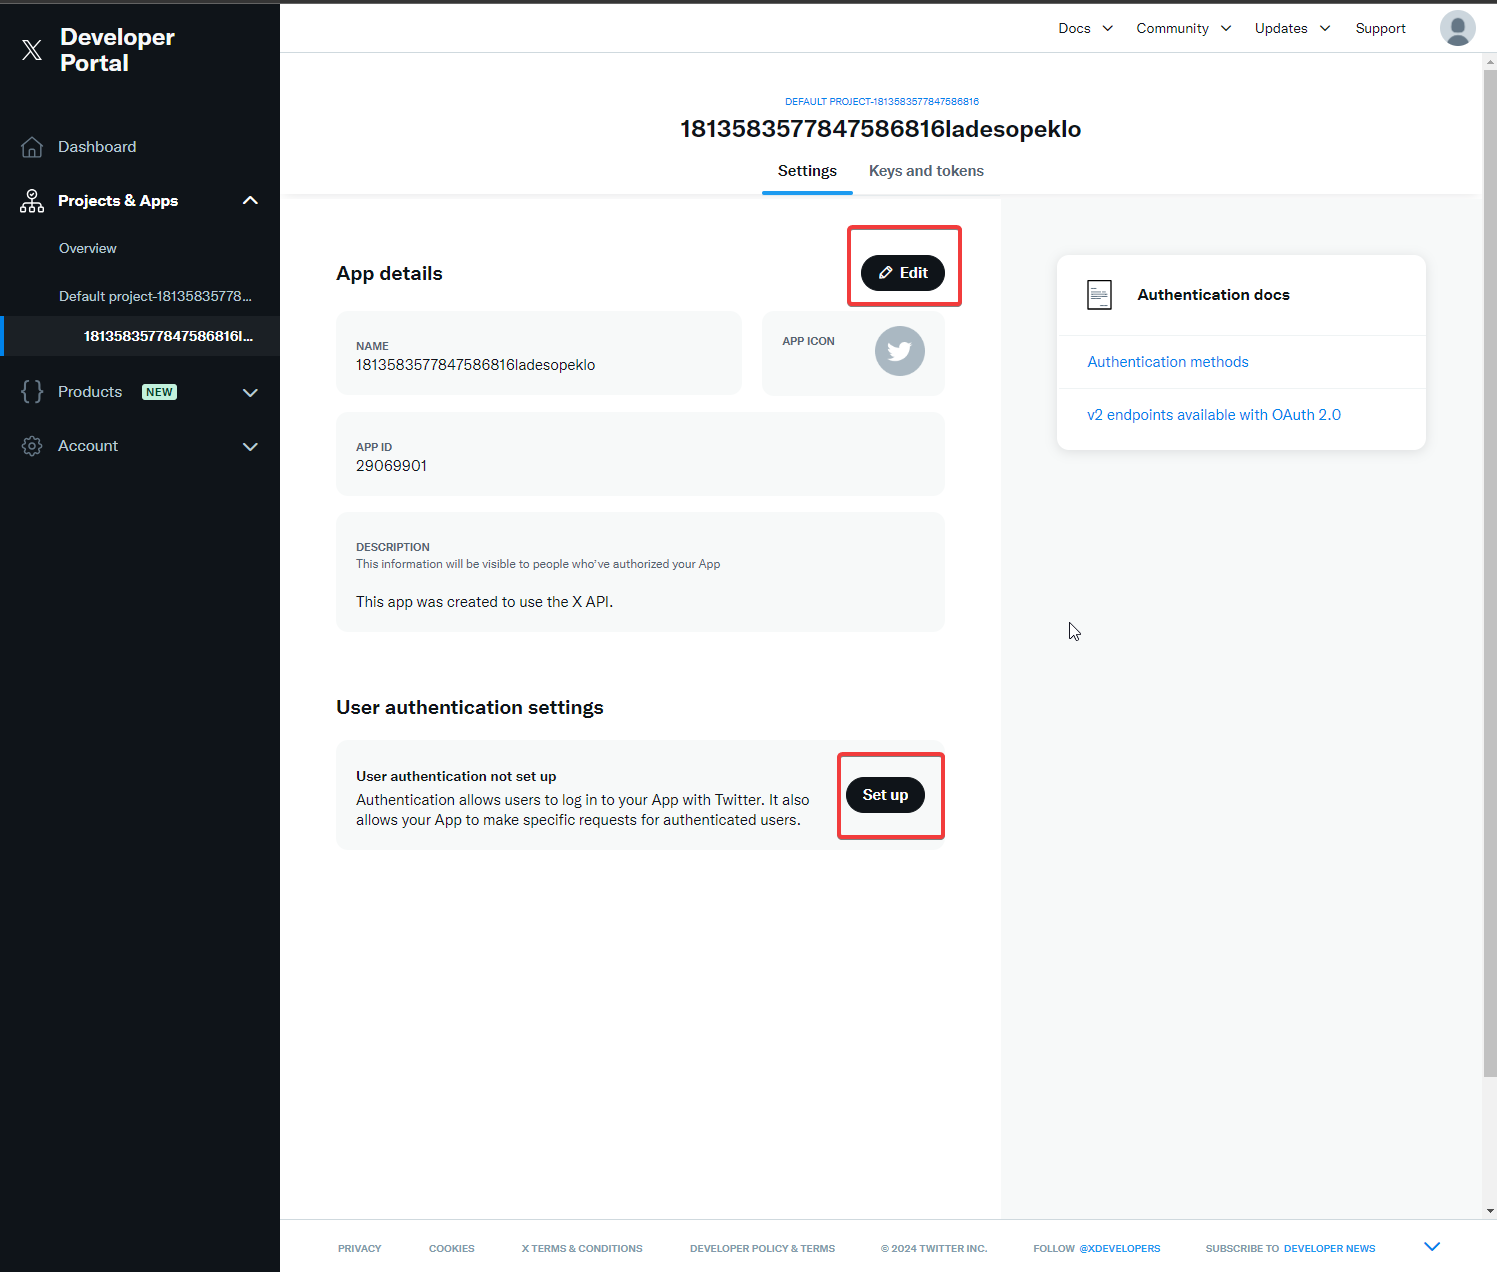
  • Update application details, such as the name, description, and icon, by clicking the "Edit" button. Next, configure the authentication settings.
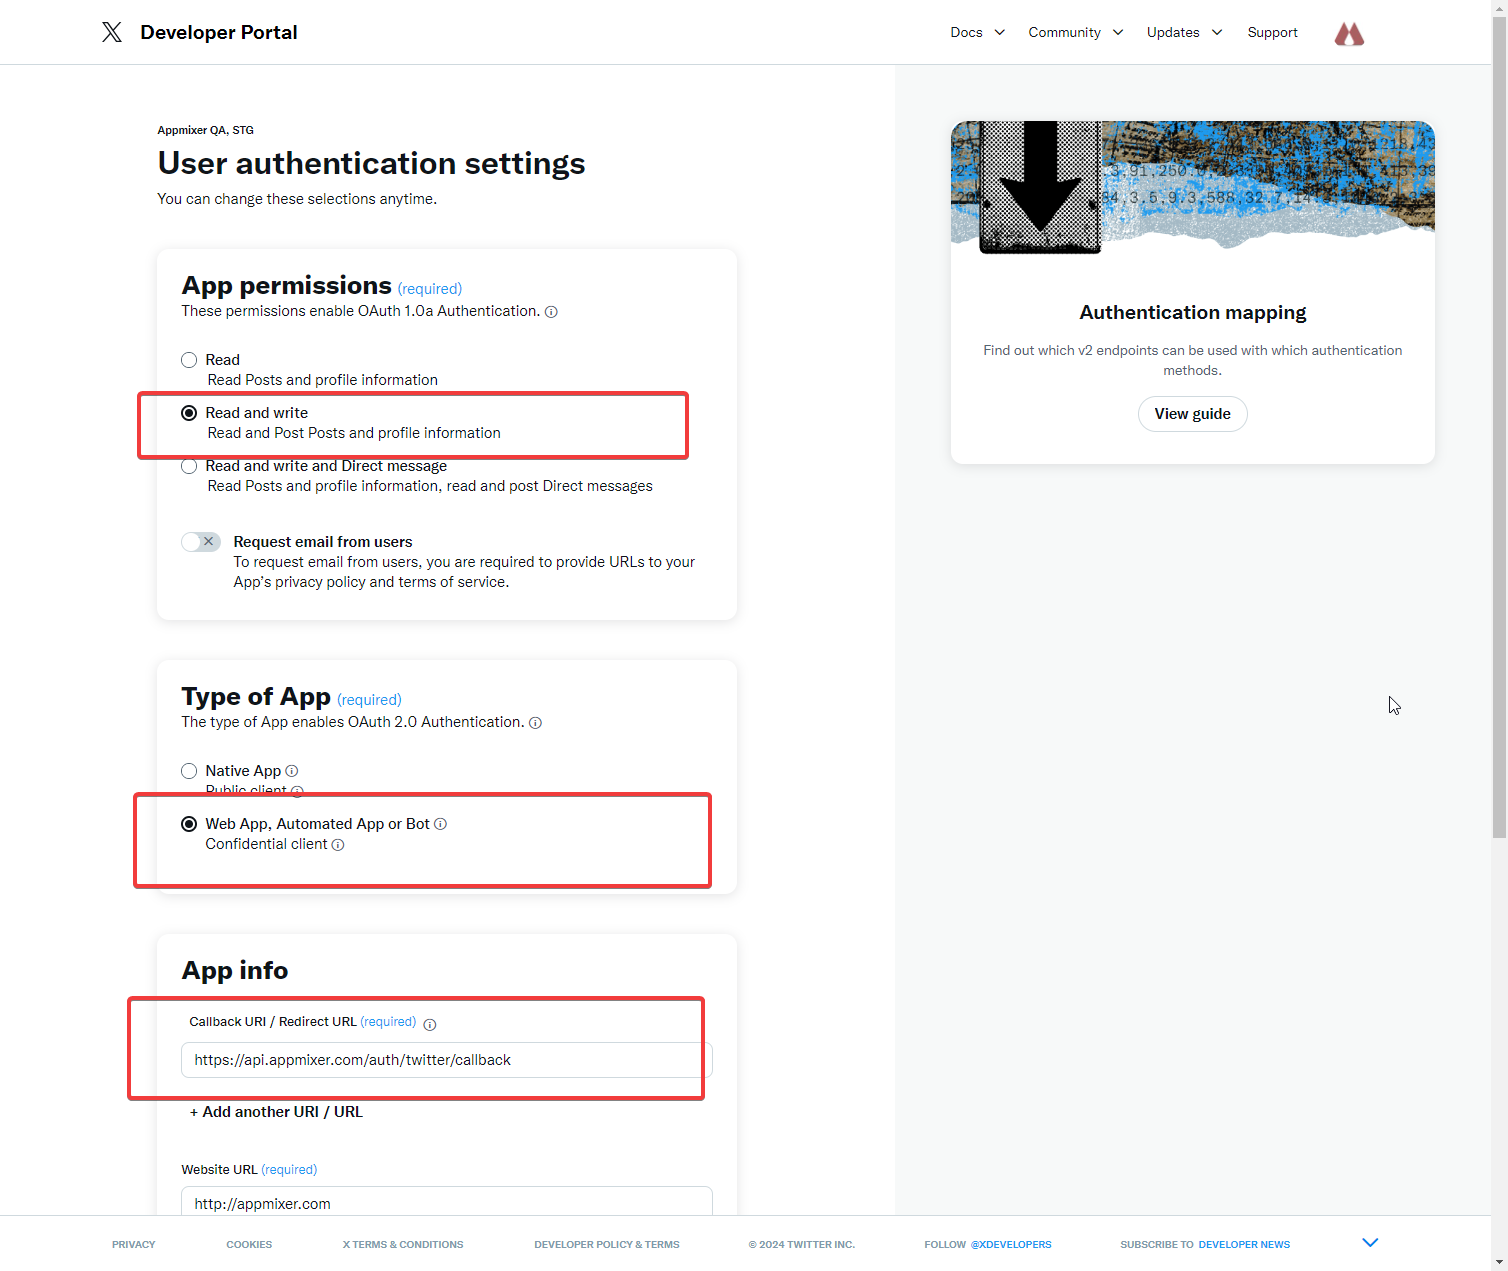
User Authentication Settings

  • Set the "App permissions" to "Read and write" and "Type of App" to "Web App"

  • Set the Redirect URI to https://[YOUR_API_BASE]/auth/twitter/callback, for example https://api.appmixer.com/auth/titter/callback
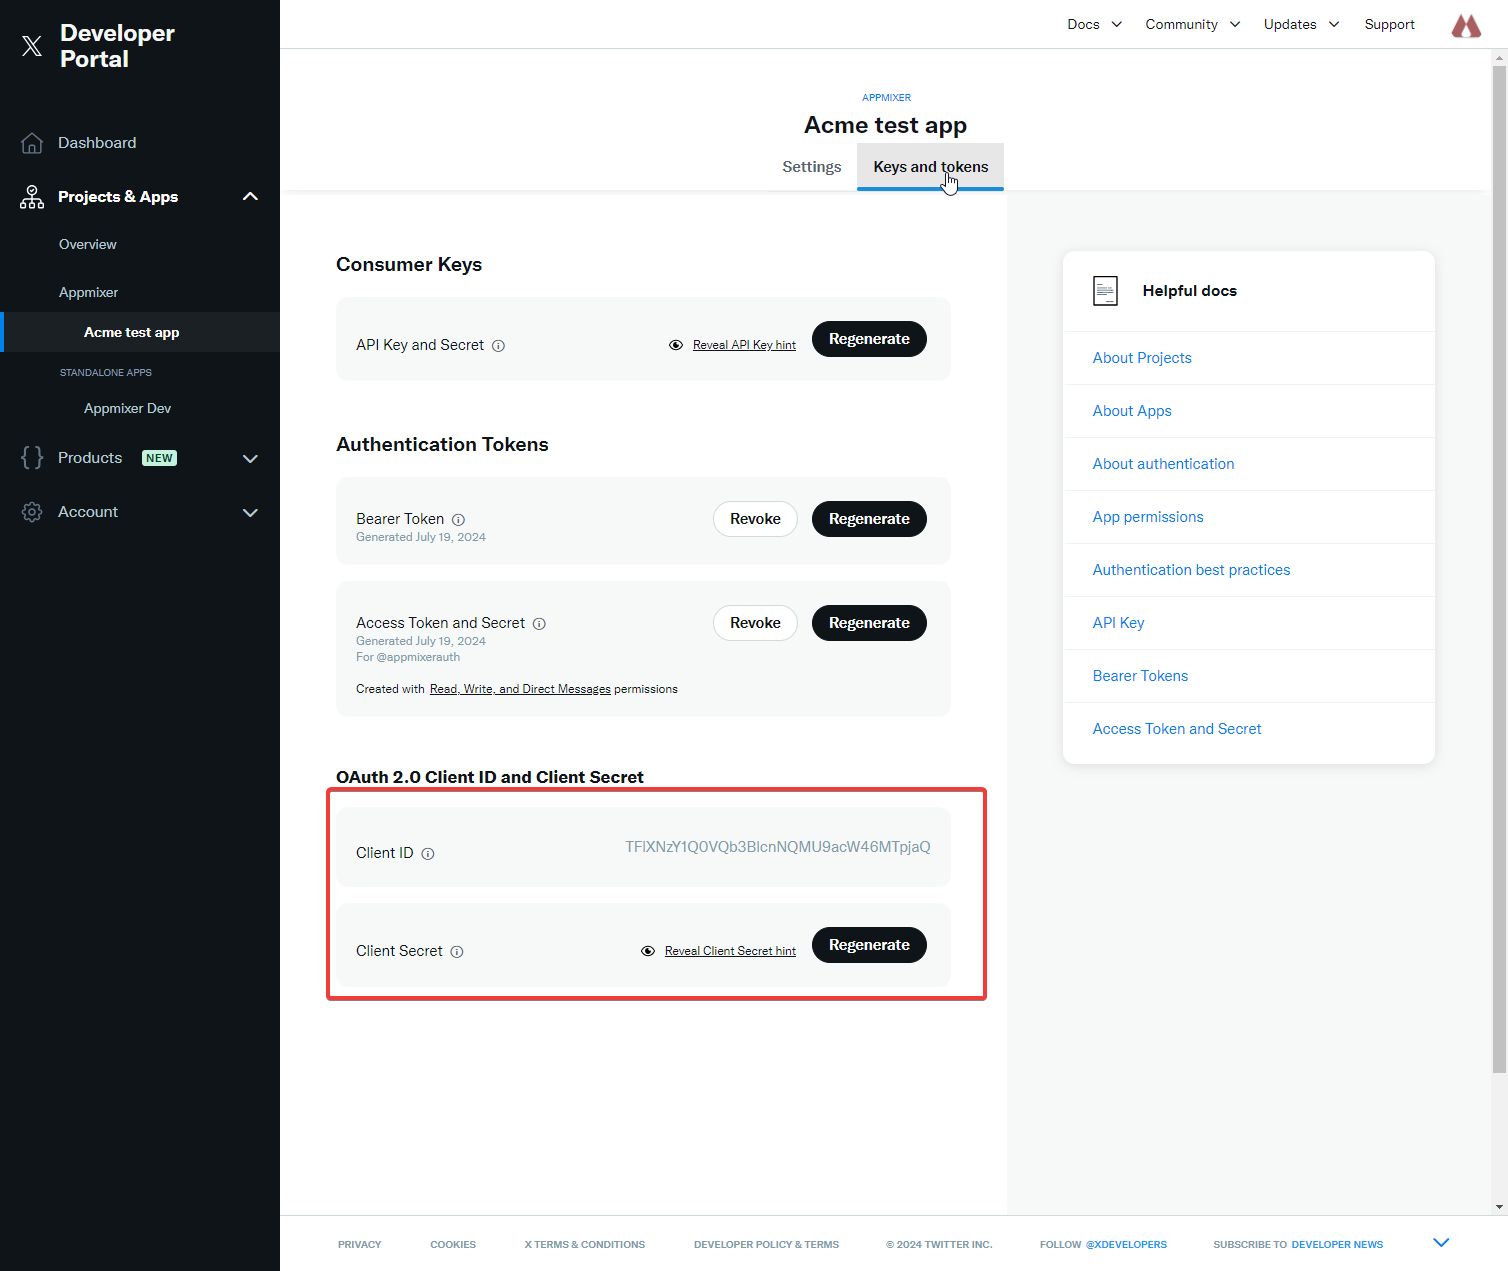
Keys and Tokens

  • Get the Client Id and Client Secret from the Keys and Tokens page

  • Configure the App Key as clientId and the App Secret as clientSecret in the service settings within the Backoffice, under the configuration ID appmixer:twitter.

To learn more about configuring connectors, please visit the section.

Connector Configuration
Twitter Developer Platform
Developer Dashboard